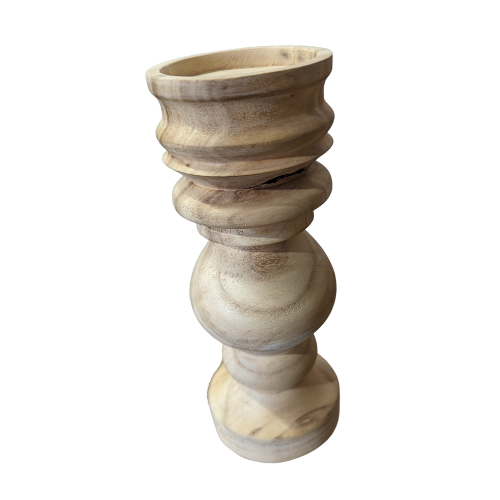
When I bought my Laguna REVO 18|36 lathe I knew one of the things I wanted to make was a candlestick. There are a variety of different types of candlesticks including tapers and pillars. You can also create sculptural pieces that can hold candles too.
Turning a candlestick is an exciting experience for any woodworker. The process requires a variety of tools, including a roughing gouge, spindle gouge, parting tool, and scrapers.
To start, I secured a 3-inch square oak block that was about 7 inches tall between the centers of the lathe and began roughing it down using the roughing gouge. I slowly shaped the wood until it was cylindrical and then moved on to create the various features of the candlestick.
The first step was creating a tenon at one end of the wood piece that would fit into the headstock’s chuck. After that, I began working on the other end to create an inset that would form the candlestick’s top.
To create the necessary features on the candlestick, I used a variety of tools. I used a spindle gouge to create a cove and then used a parting tool to define the transition between the cove and the remaining section of the candlestick. I then used a roughing gouge to shape the middle section of the candlestick into a cylinder.
To add more interest to the design, I created several beads using a spindle gouge and then used a scraper to smooth them out. Finally, I used a skew chisel to shape and smooth the top of the candlestick.
Once I was happy with the shape of the candlestick, I sanded it until it was smooth. Starting with 120-grit sandpaper and working my way up to 400-grit. I then applied a finish to the wood to protect it from damage.
In the end, I was thrilled with the result of my first candlestick turned on the Laguna REVO 18|36 lathe. This project allowed me to practice a variety of lathe techniques and produce a beautiful and functional piece of woodworking. You can find this piece for sale in the shop, but there is only one available like all our pieces.
